
Mastering the Art of Sanding with Different Sanders
Welcome to our blog post on sanding techniques and tips! Whether you are a beginner or a seasoned DIY enthusiast, understanding the different types of sanders and choosing the right sandpaper grit for your project is essential. In this post, we will dive into the various types of sanders available in the market and explain their uses. We will also provide guidance on selecting the perfect sandpaper grit for different surfaces and explore proper techniques for sanding with a belt sander and achieving smooth finishes with a random orbital sander. Additionally, we will share expert tips for tackling curved and contoured surfaces. Let’s dive in and enhance your sanding skills!
Understanding the Different Types of Sanders
When it comes to woodworking and DIY projects, sanding is an essential step in achieving a smooth and polished finish. However, with so many different types of sanders available in the market, it can be overwhelming to choose the right one for your specific needs. In this blog post, we will discuss and understand the different types of sanders and their respective uses.
1. Belt Sanders:
Belt sanders are powerful sanding tools that come with a continuous loop of sandpaper attached to a pair of drums. They are ideal for removing large amounts of material quickly and efficiently. Belt sanders are commonly used for sanding large flat surfaces, such as floors, tabletops, and doors.
2. Orbital Sanders:
Orbital sanders, also known as quarter-sheet sanders, feature a square or rectangular sanding pad that vibrates in small circles. They are versatile and can be used for a variety of tasks, including smoothing surfaces, removing paint or varnish, and sanding between coats of finish. Orbital sanders are best suited for small to medium-sized projects.
3. Random Orbital Sanders:
Random orbital sanders are similar to orbital sanders but with a round sanding pad. They combine the spinning motion of a disc sander with the random orbiting motion of an orbital sander, providing a swirl-free finish. Random orbital sanders are great for both rough sanding and fine finishing.
4. Detail Sanders:
Detail sanders, also known as mouse sanders, are designed specifically for intricate sanding tasks. They have a triangular sanding pad that can reach tight corners and crevices. Detail sanders are perfect for refinishing furniture, sanding moldings, and working on small crafts or projects with intricate designs.
5. Multi-purpose Sanders:
As the name suggests, multi-purpose sanders are versatile tools that can be used for various sanding applications. They usually come with interchangeable sanding heads or attachments, allowing you to switch between different sanding types and grits. Multi-purpose sanders are suitable for a wide range of projects and are a great option for those who need multiple sanders but have limited space.
| Type of Sander | Main Features |
|---|---|
| Belt Sanders | Powerful, ideal for large flat surfaces |
| Orbital Sanders | Vibrates in small circles, versatile |
| Random Orbital Sanders | Swirl-free finish, suitable for rough and fine sanding |
| Detail Sanders | Triangular pad for intricate sanding tasks |
| Multi-purpose Sanders | Interchangeable sanding heads, versatile |
In conclusion, understanding the different types of sanders is crucial in selecting the right tool for your sanding needs. Each type of sander has its own strengths and is suited to specific projects. Whether you need to sand large surfaces, achieve a fine finish, or work on intricate details, there is a sander available to help you accomplish your woodworking goals.
Choosing the Right Sandpaper Grit for the Job
Choosing the right sandpaper grit for the job is essential to achieving the desired results in any sanding project. With a wide range of sandpaper grit options available, it can be overwhelming to determine which one to use. Understanding the different types of sandpaper grit and their specific applications is key to selecting the appropriate grit for your project.
When it comes to sandpaper grit, the number indicates the size of the abrasive particles embedded in the paper. Lower grit numbers, such as 40 or 60, have larger particles and are ideal for heavy material removal or shaping surfaces. These coarse grits are commonly used for rough sanding of unfinished wood, leveling uneven surfaces, or removing old paint or varnish.
Medium grit sandpapers, ranging from 80 to 120, strike a balance between material removal and surface refinement. They are suitable for smoothing the surface after coarse sanding, removing scratches, or preparing the surface for the application of paint or finish. This grit range is commonly used for intermediate sanding tasks and general woodworking projects.
Higher grit numbers, typically starting from 150 and going up to 600 or higher, are considered fine grits. Fine grit sandpapers are used for final sanding and achieving a smooth, polished finish. They are ideal for sanding between coats of paint or finish, removing small imperfections, or achieving a smooth surface on sensitive materials like metal or plastic.
In addition to the standard grits mentioned above, there are specialized sandpapers available for specific purposes. For example, extra-coarse grits, such as 24 or 36, are designed for heavy-duty sanding on rough surfaces or for fast material removal. On the other end of the spectrum, there are ultra-fine grits like 800 or 1000, which are used for extremely delicate surfaces or for the final buffing and polishing stages.
Understanding the different sandpaper grits and their applications allows you to choose the right grit for the job at hand. Remember that each sanding project is unique, and choosing the appropriate grit is crucial to obtaining the desired outcome. Whether you’re sanding wood, metal, or plastic, consider the level of material removal, surface refinement, and final finish required to select the most suitable sandpaper grit.
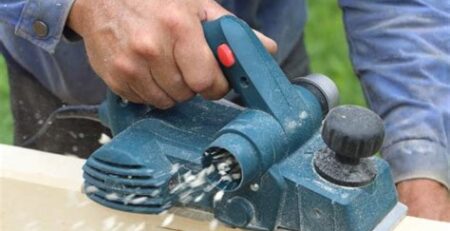
Proper Technique for Sanding with a Belt Sander
Sanding is a crucial step in achieving a smooth and professional-looking finish on various woodworking projects. When it comes to sanding, using the right technique is just as important as having the right tools. One commonly used tool for sanding is a belt sander, which is known for its power and efficiency in removing material quickly. However, improper use of a belt sander can lead to costly mistakes and damage to your workpiece. In this blog post, we will discuss the proper technique for sanding with a belt sander, ensuring that you get the best results possible.
1. Preparation: Before you start sanding with a belt sander, it is essential to prepare your work area and the tool itself. Make sure your workpiece is securely clamped down to prevent any movement during the sanding process. Check the condition of your sanding belt and ensure it is properly aligned and tightened on the sander. Additionally, wear protective goggles and a dust mask to protect yourself from flying debris and inhaling dust particles.
2. Proper Grip: When using a belt sander, it’s crucial to maintain a firm and controlled grip on the tool. Hold the sander with both hands and position them comfortably on the handles, ensuring a steady grip. Avoid applying excessive downward pressure as the weight of the sander should be enough to provide the necessary force for sanding. Let the sander do the work and avoid forcing it against the surface, as this may result in uneven sanding or gouging.
3. Movement Technique: The key to proper sanding with a belt sander is to keep it moving constantly. Start by positioning the sander at one end of the workpiece and turn it on. Slowly lower the sander onto the surface and begin moving it back and forth in the direction of the wood grain. Avoid stopping or lingering in one area for too long, as this can create uneven spots or over sanding. Keep a consistent pace and use gentle, sweeping motions until you reach the other end of the workpiece.
List of Key Points:
- Prepare your work area and check the sanding belt
- Securely grip the belt sander with both hands
- Maintain a constant and controlled movement
- Avoid applying excessive downward pressure
- Sand in the direction of the wood grain
Table – Common Mistakes to Avoid:
| Mistake | Consequence |
|---|---|
| Sanding in one spot for too long | Creates uneven surfaces |
| Pressing too hard on the sander | May result in gouges or scratches |
| Not sanding with the grain | Leads to visible sanding marks |
By following these proper sanding techniques, you can achieve a smooth and flawless finish with a belt sander. Remember to take your time, be patient, and practice on scrap wood before working on your actual project. With practice and experience, you’ll master the art of sanding and create professional-quality woodworking pieces.
Achieving Smooth Finishes with a Random Orbital Sander
When it comes to achieving a smooth finish on your woodworking projects, a random orbital sander can be your best friend. This versatile power tool is designed to eliminate swirl marks and produce a flawless surface. Whether you are a beginner or an experienced woodworker, understanding the proper techniques and utilizing the right sandpaper grit can make all the difference in achieving the desired results.
One of the key advantages of a random orbital sander is its ability to move in two simultaneous motions. The pad of the sander not only spins in a small circular motion but also moves back and forth. This dual-action creates random patterns, hence the name, which prevent the formation of swirl marks on the surface of the wood. The random orbital sander also features a soft, rounded pad that conforms to the contours of the workpiece, resulting in an even and smooth finish.
Expert Tips for Sanding Curved and Contoured Surfaces
When it comes to sanding curved and contoured surfaces, it can be a daunting task to achieve a smooth finish. However, with the right techniques and tools, you can master this skill and create professional-looking results. In this blog post, we will share expert tips to help you effectively sand curved and contoured surfaces.
1. Choose the right sanding tool: One of the key factors in sanding curved and contoured surfaces is selecting the appropriate sanding tool. A sanding sponge or a flexible sanding pad is ideal for reaching the nooks and crannies of curved surfaces. These tools provide flexibility and conform to the shape of the surface, ensuring even sanding.
2. Use the correct sandpaper grit: Selecting the right sandpaper grit is crucial for achieving smooth finishes on curved and contoured surfaces. Start with a coarser grit, such as 80 or 100, to remove any rough spots or imperfections. Then, gradually move up to finer grits, like 180 or 220, to refine the surface and create a polished finish. Remember to change the sandpaper regularly to maintain its effectiveness.
3. Sand in the direction of the grain: When sanding curved and contoured surfaces, it’s important to follow the natural direction of the grain. This will prevent any potential damage or scratches on the surface. Move the sandpaper or sanding tool in a gentle, back-and-forth motion, keeping it parallel to the contours of the surface. Avoid applying too much pressure and let the tool do the work.
List of helpful tips:
- Ensure the surface is clean and free from dust or debris before starting the sanding process.
- Work in small sections to ensure thorough sanding and avoid missing any areas.
- If necessary, use sanding blocks or other supporting tools to maintain a consistent level of pressure during sanding.
- Be patient and take your time. Rushing the sanding process can lead to uneven finishes and mistakes.
- After sanding, wipe down the surface with a damp cloth to remove any dust before applying finishes or paint.
Table: Comparison of Sanding Tools:
| Sanding Tool | Advantages | Disadvantages |
|---|---|---|
| Sanding Sponge | Flexible and conforms to contours, easy to hold | May wear out quickly |
| Flexible Sanding Pad | Provides even pressure, can reach difficult areas | May require additional sandpaper replacement |
By following these expert tips and techniques, you can confidently tackle the challenge of sanding curved and contoured surfaces. Remember to choose the right sanding tool, use the correct sandpaper grit, and sand in the direction of the grain. With practice and patience, you’ll be able to achieve smooth and professional finishes on any curved or contoured surface.


Leave a Reply