
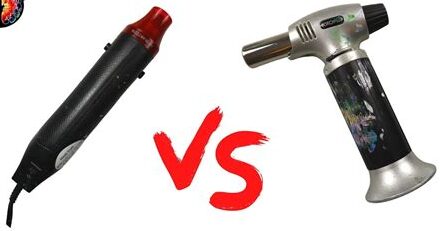
Top 10 Uses of a Heat Gun in Home Improvement
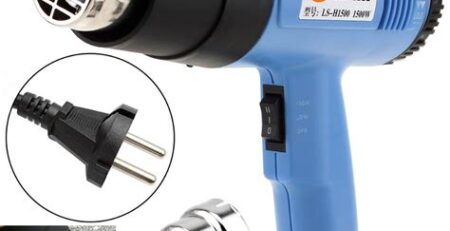
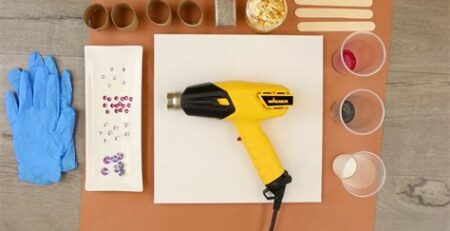
Welcome to our blog post all about the versatile and handy tool known as a heat gun! Whether you’re a DIY enthusiast or a professional handyman, a heat gun is a must-have in your toolbox. In this post, we will explore the various uses and benefits of this powerful tool, ranging from removing paint and stripping wallpaper to thawing frozen pipes and shaping plastic. With a heat gun by your side, you’ll be equipped to tackle all sorts of projects with ease and efficiency. So, let’s dive in and discover the endless possibilities of a heat gun!
Removing paint easily with a heat gun
Removing paint from surfaces can be a tedious and time-consuming task. However, with the help of a heat gun, this process can be made much easier and more efficient. A heat gun is a versatile tool that emits a stream of hot air, which can be directed onto paint to soften and loosen it. Whether you are renovating your home or simply want to update the look of a piece of furniture, a heat gun can be a valuable tool in your arsenal.
When using a heat gun to remove paint, it is important to take certain precautions to ensure your safety. First and foremost, always wear protective eyewear and gloves to shield yourself from any potential injuries or burns. Additionally, make sure to work in a well-ventilated area to avoid inhaling any fumes or smoke from the paint. Lastly, be mindful of the surface you are working on, as excessive heat can damage certain materials. Now that we have covered the necessary safety measures, let’s delve into the process of removing paint with a heat gun.
Listed below are the steps to effectively remove paint using a heat gun:
- Prepare the work area by laying down a drop cloth or newspaper to catch any paint chips or debris.
- Plug in the heat gun and set it to a low to medium heat setting.
- Hold the heat gun about 2-3 inches away from the painted surface and begin moving it back and forth in a sweeping motion.
- As the paint starts to bubble and blister, use a scraper or putty knife to gently lift and remove the softened paint.
- Continue heating and scraping until all the paint has been removed from the surface.
- Once the majority of the paint has been removed, use sandpaper or a sanding block to smooth out any remaining residue or rough patches.
- Finally, wipe down the surface with a damp cloth to remove any lingering paint particles.
Using a heat gun to remove paint offers several advantages. Firstly, it is a quicker method compared to traditional paint removal techniques such as sanding or using chemical strippers. The heat gun softens the paint, allowing for easier and faster removal. Furthermore, it is a more eco-friendly option as it eliminates the need for harsh chemicals. Additionally, the heat gun can be used on various surfaces such as wood, metal, or even brick, making it a versatile tool for any painting project.
In conclusion, a heat gun is a valuable tool for removing paint easily and efficiently. By following the proper safety measures and adhering to the step-by-step process, you can effectively strip away layers of paint from any surface. So, whether you are tackling a home renovation or a simple DIY project, consider using a heat gun for hassle-free paint removal.
Stripping wallpaper quickly using a heat gun
Stripping wallpaper can be a tedious and time-consuming task, but with the help of a heat gun, it can be a much quicker and more efficient process. A heat gun is a powerful tool that emits a concentrated stream of hot air, capable of softening and loosening the adhesive behind wallpaper. This allows for easy removal without causing damage to the underlying surface. In this blog post, we will explore the step-by-step process of stripping wallpaper quickly using a heat gun.
Step 1: Preparation
Before beginning the wallpaper removal process, it is important to prepare the area properly. Start by ensuring that all furniture and decorations are removed from the room or covered adequately to protect them from dust or debris. Additionally, cover the floor with a drop cloth or plastic sheeting to catch any loose wallpaper or adhesive.
Step 2: Safety precautions
Using a heat gun can potentially be dangerous if not handled with care. Make sure to wear protective goggles and gloves to shield yourself from heat and flying debris. It’s also beneficial to keep a fire extinguisher nearby as a precautionary measure.
Step 3: Heating the wallpaper
Start by setting your heat gun to a moderate temperature, typically around 400 degrees Fahrenheit. Hold the heat gun at a distance of about 6 to 8 inches from the wallpaper and begin heating the surface in a slow, circular motion. The heat will soften the adhesive, making it easier to remove the wallpaper.
Step 4: Removing the wallpaper
Once the wallpaper has been adequately heated, use a putty knife or a wallpaper scraper to gently lift and peel the softened wallpaper away from the wall. Be cautious not to apply too much pressure or damage the wall underneath. If necessary, reapply heat to stubborn areas to ensure smooth removal.
Step 5: Cleaning up
After all the wallpaper has been stripped away, there may still be residual adhesive left on the walls. To remove this, dampen a sponge or cloth with warm, soapy water and gently scrub the surface. For particularly stubborn adhesive, you can use a commercial wallpaper stripper or a mixture of water and vinegar.
By following these steps and utilizing a heat gun, you can strip wallpaper quickly and efficiently. This method not only saves time but also minimizes potential damage to the walls, making it an ideal option for anyone looking to refresh their space. Remember to always exercise caution and follow safety guidelines when using a heat gun or any other tool.
Thawing frozen pipes with a heat gun
Thawing Frozen Pipes with a Heat Gun
During the winter months, freezing temperatures can lead to frozen pipes, causing major inconvenience and potential damage to your home. While there are various methods to thaw frozen pipes, using a heat gun can be an effective and efficient solution. A heat gun, with its high temperature airflow, can quickly and safely thaw frozen pipes, allowing for the normal flow of water to be restored.
Before attempting to thaw frozen pipes, it’s important to locate the affected area. Inspect the exposed pipes in your home, particularly those located in unheated spaces such as basements, garages, or crawl spaces. Look for frost accumulation, bulging pipes, or areas where water flow has ceased. Identifying the frozen pipe(s) is crucial to focus your efforts and ensure efficient thawing.
Once you have located the frozen pipe, it’s time to bring out the heat gun. Begin by plugging in the heat gun and adjusting the temperature setting. It is recommended to start with a low to medium heat setting to avoid damaging the pipes. Position the heat gun a few inches away from the frozen area and move it slowly along the length of the pipe. The hot air emitted from the heat gun will gradually warm up the pipe, melting the ice within.
It’s important to exercise caution when using a heat gun to thaw frozen pipes. Keep the heat gun away from any flammable materials and do not leave it unattended. Additionally, be mindful of overheating the pipes, as this can potentially cause them to burst. If you are unsure or uncomfortable using a heat gun, it is advisable to seek professional assistance.
- Benefits of Thawing Frozen Pipes with a Heat Gun
- Avoids potential pipe bursts
- Quick and efficient solution
- Can be done without extensive plumbing knowledge
- Cost-effective compared to other thawing methods
Thawing frozen pipes with a heat gun is a practical method that can save you time, money, and the headache of dealing with frozen pipes. By following the appropriate safety precautions and using the heat gun properly, you can effectively restore water flow and prevent further damage to your home. Stay warm and worry-free during the winter by keeping a heat gun handy for thawing frozen pipes!
Shrinking and sealing plastic with a heat gun
If you’re looking for a versatile tool to shrink and seal plastic materials, then a heat gun is an excellent choice. With its strong and concentrated heat, a heat gun can be used for a wide range of tasks, including shrinking plastic wrap, sealing plastic containers, and even creating custom-shaped plastic pieces. In this blog post, we will explore the various uses of a heat gun for shrinking and sealing plastic, as well as provide some tips and precautions to ensure safe and effective use.
One of the most common applications of a heat gun when it comes to plastic is shrinking plastic wrap or film. Whether you’re wrapping a gift basket, food items, or various products, a heat gun can quickly and evenly shrink the plastic around the object, creating a tight and professional-looking finish. Simply hold the heat gun a few inches away from the plastic wrap and move it in a slow and sweeping motion. The heat will cause the plastic to shrink tightly around the object, securing it in place and offering protection.
In addition to shrinking plastic wrap, a heat gun can also be used to seal plastic containers, such as bottles or jars. This is especially useful when dealing with homemade products or storing items that need an airtight seal. To seal a plastic container, first, ensure that the lid or cap is tightly secured. Then, use the heat gun to apply heat directly to the area where the lid meets the container. The heat will soften the plastic, allowing it to create a tight seal when cooled down. Remember to be cautious and avoid overheating, as excessive heat can cause the plastic to deform or melt.
- Shrinking plastic wrap
- Sealing plastic containers
- Creating custom-shaped plastic pieces
| Benefits of using a heat gun for shrinking and sealing plastic: |
|---|
| Efficiency: A heat gun provides quick and even heat distribution, allowing for efficient shrinking and sealing of plastic materials. |
| Versatility: Aside from shrinking and sealing, a heat gun can be used for various other tasks, such as paint removal or thawing frozen pipes. |
| Customization: With a heat gun, you can easily create custom-shaped plastic pieces by heating and molding the material to meet your specific needs. |
| Professional results: The use of a heat gun allows for a neat and professional finish, whether you’re wrapping a gift or sealing a plastic container. |
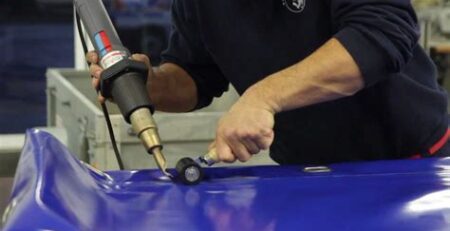
Bending and molding plastic using a heat gun
When it comes to working with plastic, one of the most versatile tools you can have in your arsenal is a heat gun. A heat gun is a handheld device that produces a stream of hot air, which can be used to soften and reshape plastic materials. Whether you are a DIY enthusiast or a professional in the world of crafts and fabrication, knowing how to properly bend and mold plastic using a heat gun can open up a world of possibilities for your projects.
One of the key benefits of using a heat gun for bending and molding plastic is its ability to provide localized heat. Unlike other heating methods, such as ovens or boiling water, a heat gun allows you to apply heat precisely where it is needed. This means that you can focus the heat on specific areas of the plastic, allowing for more controlled and accurate shaping. Whether you are working with thin sheets of plastic or thicker, more rigid materials, a heat gun gives you the flexibility to mold the plastic to your desired shape.
Before you begin using a heat gun to bend and mold plastic, it is important to take some safety precautions. Always wear heat-resistant gloves to protect your hands from the hot air produced by the heat gun. Additionally, work in a well-ventilated area to avoid inhaling any fumes that may be emitted during the heating process. It is also a good idea to have a scrap piece of plastic on hand to test your technique and familiarize yourself with the behavior of different types of plastic when heated.
- Choose the right type of plastic: Not all plastics are suitable for bending and molding using a heat gun. Some plastics may release toxic fumes when heated or may not respond well to the shaping process. It is important to choose a plastic that is specifically designed for heat shaping. Materials such as acrylic, PETG, and polycarbonate are commonly used for heat bending.
- Prepare the plastic: Before applying heat, ensure that the plastic is clean and free of any dirt or debris. This will help to achieve a smooth and uniform shape. You can use soap and water or a mild solvent to clean the surface of the plastic.
- Apply heat gradually: Start by holding the heat gun about 2-3 inches away from the plastic and move it slowly across the area that needs to be shaped. Keep the heat gun in motion to evenly distribute the heat and prevent any damage to the plastic. Gradually increase the temperature as needed, but be cautious not to overheat the plastic.
- Shape the plastic: As the plastic begins to soften, you can use various tools to shape it according to your desired form. It is important to work quickly yet carefully during this stage, as the plastic will be pliable and can easily be deformed. Use clamps or molds to hold the plastic in place until it cools and retains its new shape.
- Cooling and finishing: Once you have achieved the desired shape, allow the plastic to cool naturally or use a cooling fan to expedite the process. Once cooled, you can trim any excess plastic and sand the edges for a smooth finish.
In conclusion, a heat gun is a valuable tool for bending and molding plastic. By following the proper techniques and taking necessary safety precautions, you can create custom shapes and forms out of various types of plastic materials. Whether you are working on DIY projects or professional applications, mastering the art of bending and molding plastic using a heat gun can greatly enhance your creative abilities.
Frequently Asked Questions
How can I remove paint easily using a heat gun?
A heat gun can be used to soften the paint, making it easier to scrape off using a putty knife.
What is the best way to strip wallpaper quickly with a heat gun?
By using a heat gun, you can gently heat the wallpaper, allowing it to loosen and peel off more easily.
Can a heat gun be used to thaw frozen pipes?
Yes, directing the heat gun towards the frozen pipes can help to thaw them quickly, but caution must be taken to avoid overheating or damaging the pipes.
How can I shrink and seal plastic using a heat gun?
With a heat gun, you can apply heat to the plastic, causing it to shrink and create a tight seal around whatever it is being applied to.
What is the process of bending and molding plastic with a heat gun?
By heating the plastic with a heat gun, it becomes more pliable, allowing you to bend and shape it as desired.
Are there any safety precautions to consider when using a heat gun?
Yes, it is important to always wear heat-resistant gloves, safety goggles, and work in a well-ventilated area when using a heat gun. It is also crucial to avoid pointing the heat gun at flammable materials.
Can a heat gun be used on any surface?
While a heat gun can be used on various surfaces, it is recommended to test a small, inconspicuous area first to ensure that the heat does not cause any damage.


Leave a Reply