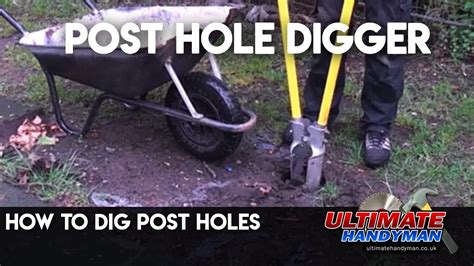
Tips and Tricks for Efficiently Digging Post Holes with a Digger
Are you planning a DIY project that involves digging post holes? Whether you’re building a fence, installing a mailbox, or setting up a deck, using a digger can make the job much easier and quicker. In this blog post, we’ll cover everything you need to know to efficiently dig post holes with a digger. We’ll discuss how to choose the right digger for the job, prepare the ground for digging, optimize your technique for maximum efficiency, and manage common challenges that may arise during the digging process. We’ll also share some tips for post-hole maintenance to ensure long-lasting results. By the end of this post, you’ll feel confident and empowered to tackle your next digging project with ease and skill. Let’s get started!
Choosing the Right Digger for the Job
When it comes to selecting the digger for your construction or landscaping project, there are a few key factors to consider in order to make the right choice. The first consideration is the size and scope of the digging job. If you are working on a small residential project, you may only need a small digger or mini excavator. However, for larger commercial projects, you may require a larger, more powerful excavator to get the job done efficiently.
Another important factor to consider is the type of terrain you will be working on. Different diggers are designed to handle different types of soil and terrain, so it’s important to choose a digger that is well-suited to the specific conditions of your project site. For example, if you will be working in rocky or uneven terrain, you will need a digger with excellent stability and maneuverability.
Additionally, you should consider the depth and width of the trenches or holes you need to dig. Some diggers are better suited for digging deep, narrow trenches, while others are better for digging wider, shallower holes. By carefully evaluating the specific requirements of your project, you can ensure that you select the most suitable digger for the job.
Lastly, consider the availability of diggers in your area. If you are working on a tight schedule, it’s important to choose a digger that is readily available for rental or purchase in your area. You should also consider the cost of renting or purchasing the digger and factor that into your project budget.
Prepping the Ground for Digging
Before you begin any digging project, it’s important to properly prepare the ground to ensure a smooth and efficient process. One of the first steps in prepping the ground for digging is to clear the area of any debris, rocks, or other obstacles that could interfere with your digging equipment. This not only helps to prevent damage to your digger, but also ensures a safer work environment for you and your team.
Another important aspect of prepping the ground for digging is to mark the area where you plan to dig. This helps to ensure that you are digging in the right location and can also prevent any accidental damage to underground utilities or structures. Using flags or spray paint to mark the boundaries of the dig site is an effective way to clearly communicate the area that needs to be excavated.
Once the area is clear and properly marked, it’s essential to analyze the soil conditions to determine the best digging technique to use. Different soil types require different approaches, so it’s important to understand the composition of the soil before you begin. This may involve taking soil samples or using specialized equipment to assess the soil’s moisture content and compaction.
Finally, prepping the ground for digging also involves checking the weather forecast. Wet or rainy conditions can make digging more challenging and may even cause damage to the surrounding area. By monitoring the forecast, you can plan your digging project around the most favorable weather conditions, ultimately optimizing efficiency and safety.
Optimizing Digging Technique for Efficiency
Optimizing Digging Technique for Efficiency
When it comes to digging, it’s important to not only have the right equipment, but also to use the correct technique for the job. By optimizing your digging technique, you can work more efficiently and effectively, saving time and energy in the process.
One key aspect of optimizing your digging technique is to ensure that you are using the right digger for the job. Different types of soil and terrain require different types of diggers, so it’s important to assess the conditions before beginning your work. Whether you need a mini digger for compact spaces or a larger excavator for tougher terrain, choosing the right equipment can make a significant difference in the efficiency of your digging.
Another important factor to consider when optimizing your digging technique is the positioning of the digger. By positioning the digger in the most optimal way, you can maximize the power and reach of the equipment, minimizing the need for excessive repositioning and maximizing your efficiency.
It’s also crucial to pay attention to your digging depth and angle. By adjusting these factors based on the type of soil and the specific job at hand, you can make your digging process more efficient and effective. By maintaining a consistent and controlled digging depth and angle, you can achieve better results in less time.
Managing Common Challenges while Digging
When digging in a construction project, there are several common challenges that workers often face. One of the main challenges is encountering unexpected underground utilities, such as pipes and cables, which can cause delays and safety hazards if not properly managed.
Another challenge is dealing with varying soil conditions, such as hard clay or sandy soil, which can impact the efficiency and speed of the digging process. It is important to adapt to these conditions and use the right equipment and techniques to overcome these challenges.
Furthermore, another common challenge is working in tight or confined spaces, requiring careful planning and precision to avoid accidents and damage to surrounding structures. Proper communication and coordination among the team members is crucial in these scenarios.
Lastly, managing environmental factors such as weather conditions and terrain elevation can also pose challenges during the digging process. It’s important to be prepared for these factors by having the right protective gear and equipment to ensure the safety and efficiency of the workers.
Post-Hole Maintenance for Long-Lasting Results
After completing the task of digging post-holes, it’s important to focus on maintenance in order to ensure long-lasting results. One of the key steps in post-hole maintenance is to properly backfill the hole. This involves using the right type of soil to fill the hole, ensuring that it is compacted and level with the surrounding ground. Using a mixture of soil and gravel can also help to enhance the stability and durability of the post-hole.
Another crucial aspect of post-hole maintenance is to protect the post from moisture and decay. This can be achieved by using a preservative or sealant on the lower portion of the post before placing it in the hole. Additionally, wrapping the post with a moisture barrier or applying a protective sleeve can further safeguard it from the elements.
In addition to backfilling and protecting the post, regular inspection and maintenance of the post-hole area is essential for long-lasting results. Periodically checking for any signs of movement, shifting, or deterioration of the post and surrounding ground can help to identify and address any potential issues before they escalate. Adjusting the backfill or adding more stabilizing materials as needed can help to maintain the integrity of the post-hole over time.
Furthermore, establishing a routine inspection and maintenance schedule for post-holes can contribute to the longevity of the structure it supports. Keeping the area around the post-hole clear of debris, vegetation, and standing water can prevent potential damage and decay. By proactively addressing any maintenance needs, you can ensure that the post-hole remains stable and secure for years to come.
Frequently Asked Questions
What type of digger should I choose for my post-hole digging job?
The type of digger you should choose depends on the size and depth of the holes you need to dig. For small to medium-sized holes, a one-man auger may be sufficient. For larger or deeper holes, a two-man auger or hydraulic digger may be more appropriate.
What steps should I take to prepare the ground before digging post holes?
Before digging post holes, make sure to mark the locations of the holes and clear away any debris, rocks, or obstructions from the area. It’s also important to call your local utility company to check for any buried cables or pipes.
How can I optimize my digging technique for maximum efficiency?
To optimize your digging technique, make sure to hold the digger properly, keep a firm grip, and use your body weight to apply pressure as you dig. It’s also important to take regular breaks to avoid fatigue and maintain a consistent pace.
What are some common challenges I may face while digging post holes, and how can I manage them?
Common challenges while digging post holes include encountering tough soil, rocks, or roots. To manage these challenges, consider using the appropriate auger bit for the type of soil, and be prepared to clear away any obstacles as you encounter them.
What post-hole maintenance steps should I take for long-lasting results?
After digging post holes, be sure to backfill the holes with soil, tamp it down firmly, and add concrete for stability if necessary. Regularly inspect the posts for any signs of movement or instability, and make any necessary adjustments or repairs.


Leave a Reply