
A Step-by-Step Tutorial on How to Use a Router Tool
Welcome to our blog post on choosing and using the perfect router tool for all your woodworking needs. In this article, we will guide you through the process of selecting the right router tool for your specific requirements, as well as provide step-by-step instructions on setting up the router and workstation. Additionally, we will delve into understanding the basic functions and controls of this versatile tool and offer tips on executing precise cuts and shaping. Lastly, we will emphasize the importance of safety precautions and share some valuable maintenance tips for your router tool. So, let’s get started and enhance your woodworking skills together!
Choosing the right router tool for your needs
Choosing the right router tool for your needs is an important decision to make, as it can greatly impact the quality and efficiency of your woodworking projects. With a wide variety of router tools available in the market, it can be overwhelming to determine which one is the best fit for your specific requirements. However, by considering a few key factors, you can ensure that you make a well-informed choice.
Determine the intended use:
Before diving into the details of various router tools, it is vital to understand your specific needs and the type of projects you will be undertaking. Are you planning to do mainly edge profiling, joinery work, or heavy-duty tasks like template routing? By determining the intended use, you can prioritize the features and capabilities required in a router tool.
Consider power and speed:
Router tools come in different power options – from lightweight models with less horsepower suited for small-scale projects, to heavy-duty ones with higher horsepower for professional use. It is crucial to match the power of the router tool with the tasks you will be performing. Additionally, pay attention to the speed control options offered by the router, as it can greatly impact the precision and versatility of your work.
Evaluate the router type:
There are two main types of router tools: fixed-base routers and plunge routers. Fixed-base routers are stationary and provide stability for edge profiling and dadoing. On the other hand, plunge routers offer versatility through their ability to lower the bit into the material, making them ideal for making cuts in the middle of the workpiece. Evaluating the pros and cons of each type will help you determine which one suits your woodworking needs better.
- Consider power and speed
- Evaluate the router type
- Assess ergonomic features
- Research brands and read reviews
- Set a budget
Assess ergonomic features:
When working with a router tool, comfort and ergonomics play a significant role in ensuring ease of use and minimizing fatigue. Look for tools with comfortable grips, well-placed handles, and intuitive controls. Additionally, consider the weight of the router, as a heavy tool might become a burden during prolonged use.
Research brands and read reviews:
Once you have narrowed down your options based on power, speed, and router type, it is essential to research different brands and models. Read reviews from both professionals and hobbyists to gain insights into the performance, durability, and overall customer satisfaction of the router tools you are considering.
| Brand | Model | Power (HP) | Speed (RPM) |
|---|---|---|---|
| Brand A | Model X | 2.5 | 10,000 – 30,000 |
| Brand B | Model Y | 3.0 | 8,000 – 25,000 |
| Brand C | Model Z | 2.0 | 12,000 – 35,000 |
Set a budget:
Lastly, it is crucial to determine your budget for purchasing a router tool. While it is tempting to go for the most expensive option, it might not always be necessary or practical. Set a budget that aligns with your woodworking needs and consider the cost of additional accessories or router bits that you may require.
In conclusion, choosing the right router tool requires careful consideration of your intended use, power and speed requirements, router type, ergonomic features, brand reputation, and budget. By analyzing these factors and utilizing resources like reviews and comparisons, you can confidently select a router tool that meets your specific woodworking needs and enhances your overall efficiency and craftsmanship.
Setting up the router tool and workstation
Setting up your router tool and workstation properly is crucial to ensure smooth and efficient woodworking operations. Here are some essential steps and tips to follow:
1. Choose the right location: Find a suitable area in your workshop with enough space to accommodate your router tool and provide adequate lighting. Ensure that the area is clean, well-ventilated, and free from any clutter or obstacles that may hinder your work.
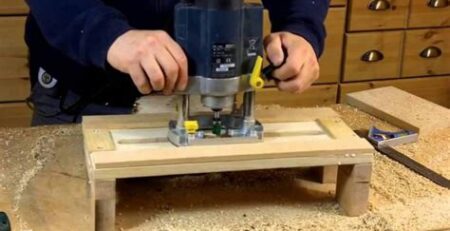
2. Workstation setup: Determine the ideal height for your router table or workbench, as it should be comfortable for you to work on and allow for proper control of the router tool. Use a spirit level to ensure that the workstation is levelled, which is essential for accurate cuts and measurements.
3. Secure the router tool: Depending on the type of router tool you have, you may need to mount it to a table or secure it on a workbench. Make sure the tool is firmly attached and stable to prevent any movement or vibrations during use. This will ensure precise and safe cutting.
4. Assemble accessories: If your router tool comes with accessories such as a fence, dust collection system, or safety guard, ensure they are correctly installed. These accessories enhance the functionality and safety of your router tool, providing better control and dust management.
5. Ensure proper power supply: Check the power requirements of your router tool and ensure you have a stable power source that meets those specifications. If needed, use a surge protector or dedicated circuit to prevent power fluctuations that could damage the tool.
6. Test the setup: Before starting any woodworking project, it is crucial to test the router tool setup. Ensure that all the controls and adjustments are working properly, the router bit is securely installed, and the safety features are functional. Take the time to familiarize yourself with the different controls and functions of the tool.
By following these steps, you can set up your router tool and workstation effectively, creating an environment that promotes productivity, accuracy, and safety. Remember to always refer to the manufacturer’s instructions and guidelines for specific set up requirements and maintenance tips.
Understanding the basic functions and controls
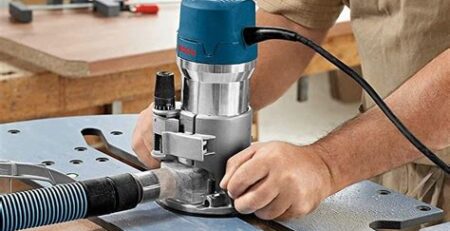
Understanding the basic functions and controls of a router tool is essential for any woodworking enthusiast or professional. The router is a versatile power tool that can be used for a variety of tasks, including cutting, shaping, and joining wood. By familiarizing yourself with the basic functions and controls of the router, you can fully harness the potential of this tool and achieve precise and efficient results.
One of the primary functions of a router is to cut and shape wood. Whether you need to create decorative edges, rabbets, dados, or grooves, the router can easily accomplish these tasks. With the right router bit, you can achieve different cuts and shapes, allowing you to unleash your creativity and bring your woodworking projects to life.
In addition to cutting and shaping, the router can also be used for joining wood. By using a router with a suitable bit, you can create strong and seamless joints, such as dovetail joints, box joints, and mortise and tenon joints. This is particularly useful when constructing furniture or other wooden structures that require sturdy connections. The router’s ability to accurately cut and shape wood makes it an indispensable tool for any woodworking project.
- Cutting: The router’s cutting function is achieved by attaching a sharp cutting bit to the router’s spindle. The router bit spins at a high speed, allowing it to remove wood and create the desired cut or shape.
- Shaping: Shaping is another essential function of the router. By using different types of router bits, you can create various decorative edges, profiles, and contours on your wooden workpieces.
- Joining: The router can also be used for joining wood. By using specialized router bits, you can create precise and strong joints, ensuring the durability and stability of your woodworking projects.
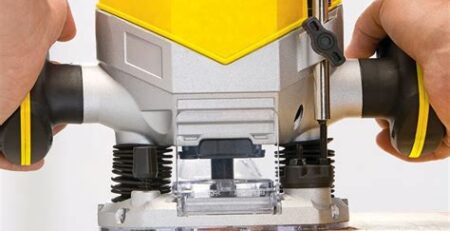
When using a router, it is important to understand and control its speed and depth of cut. These are the primary controls that allow you to adjust the tool’s performance to suit the specific requirements of your woodworking task. Most routers feature variable speed settings, allowing you to select the appropriate speed based on the hardness and thickness of the wood, as well as the type of cut you want to achieve. Adjusting the depth of cut allows you to control the amount of material that is being removed, ensuring that you achieve the desired result without causing any damage.
| Control | Function |
|---|---|
| Speed control | Adjusts the speed at which the router bit rotates, allowing you to match the router’s performance to the specific woodworking task. |
| Depth of cut control | Regulates the depth at which the router bit cuts into the wood, allowing you to achieve precise and controlled cuts or shapes. |
By understanding the basic functions and controls of a router tool, you can confidently tackle a wide range of woodworking projects. Whether you are a seasoned woodworker or a beginner, taking the time to familiarize yourself with the router’s capabilities will undoubtedly enhance your woodworking skills and allow you to create beautiful and professional-looking pieces.
Executing precise cuts and shaping with the router
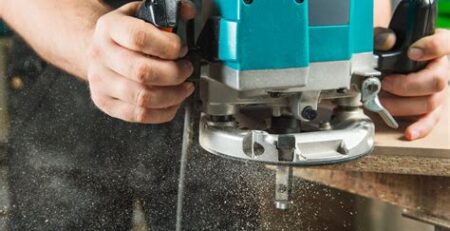
The router is a versatile and powerful tool that can be used for a variety of woodworking tasks. One of the key applications of a router is executing precise cuts and shaping wood. With the right techniques and proper setup, you can achieve incredibly accurate and clean cuts, as well as create intricate designs and profiles.
When it comes to executing precise cuts with a router, one of the most important factors is choosing the right bit. There are various types of router bits available, each designed for specific tasks. Straight bits are ideal for cutting straight lines and creating dados or grooves. Flush trim bits are perfect for trimming the edges of one material to match the contour of another. And for creating decorative edges or molding, there are numerous profile bits to choose from.
Once you have selected the appropriate bit for your desired cut or shaping task, it’s crucial to ensure that it is properly secured in the router’s collet. Make sure to tighten the collet nut firmly using a wrench, so that the bit does not slip or come loose during operation. A loose bit can not only result in an inaccurate cut but also pose a safety hazard.
Before executing any cuts, it’s advisable to make a test run on a scrap piece of wood. This allows you to preview the results and make any necessary adjustments to the router’s depth or fence position. Additionally, taking small, multiple passes rather than trying to make one deep cut will yield cleaner and more precise results. Taking your time and maintaining a steady pace while guiding the router along the desired path will also contribute to achieving accurate cuts.
When it comes to shaping wood with a router, it’s important to have a clear plan in mind. Whether you are creating intricate designs like dovetail joints or carving out recesses for inlays, having a template or guide can greatly assist in achieving the desired shape. Securing the template firmly to the workpiece and using a router with a guide bushing can help ensure that your cuts are consistent and accurate.
In addition to using the appropriate router bit and technique, maintaining a clean and sharp bit is crucial for executing precise cuts and shaping. After prolonged use, router bits can become dull and less effective. Therefore, it’s important to regularly clean the bits and sharpen them when necessary. Cleaning the bit after each use with a router bit cleaner can remove built-up debris and prolong its lifespan.
Overall, executing precise cuts and shaping with a router requires careful planning, attention to detail, and practice. By selecting the right bit, properly securing it, and using proper techniques, you can achieve the accuracy and precision you desire. Remember to always prioritize safety by wearing appropriate protective gear and following all safety guidelines provided by the manufacturer. Happy woodworking!
Safety precautions and maintenance tips for router tool
When it comes to using a router tool, safety should always be the top priority. This powerful woodworking tool can be quite dangerous if not handled properly. It is essential to take the necessary safety precautions to prevent accidents and injuries. Additionally, maintaining your router tool in good condition is crucial to ensure its efficiency and longevity. In this blog post, we will discuss some important safety precautions and maintenance tips that every user should be aware of when using a router tool.
Firstly, it is essential to wear the appropriate protective gear when operating a router tool. This includes safety goggles to protect your eyes from flying debris, ear protection to reduce the noise level, and a dust mask to prevent inhalation of harmful dust particles. Wearing close-fitting clothing and avoiding loose jewelry or accessories is also recommended to prevent entanglement with the tool.
To further enhance safety, it is crucial to keep the router tool clean and well-maintained. Regularly inspect the tool for any damages or signs of wear and tear. If any issues are found, such as a loose or damaged part, it is important to fix or replace it immediately. Keeping the router tool clean from dust and debris is also paramount to prevent any interference with its functionality.
Additionally, it is important to handle the router tool with care and use it only for its intended purpose. Avoid using excessive force or putting unnecessary pressure on the tool. Ensure that the routing bit is securely fastened and tightened before starting any operation. Never attempt to remove or adjust the bit while the router is still powered on.
- Always unplug the router tool before making any adjustments or changing the bits.
- Keep your workspace well-lit and organized to minimize the risk of accidents and mishaps.
- Do not rush or work in a distracted manner, as this can lead to mistakes and potential injuries.
- Always use the appropriate speed and depth settings for the specific task at hand.
| Safety Precautions | Maintenance Tips |
|---|---|
| Wear protective gear | Regularly inspect for damages |
| Handle with care | Keep clean and free from debris |
| Unplug before adjustments | Fix or replace damaged parts |
| Well-lit and organized workspace | Maintain appropriate speed and depth settings |
By following these safety precautions and maintenance tips, you can ensure that your experience with using a router tool is not only efficient but also safe. Keep in mind that proper safety practices and regular maintenance go hand in hand for a smooth and accident-free woodworking journey.
Frequently Asked Questions
What factors should be considered when choosing a router tool?
When choosing a router tool, you should consider factors such as power, router bit compatibility, ergonomics, and available features based on your specific needs and projects.
What are the essential steps for setting up a router tool and workstation?
To set up a router tool and workstation, you need to assemble the router, install the appropriate router bit, secure the workpiece, adjust the depth of cut, and ensure proper dust collection and safety measures.
What are the basic functions and controls of a router?
A router tool can perform functions like cutting, trimming, shaping, and joinery. It typically has controls for adjusting speed, depth of cut, and fence position, which affect the precision and outcome of the routing process.
How can you achieve precise cuts and shaping using a router?
To achieve precise cuts and shaping, it is important to use the appropriate router bit, follow proper feeding techniques, make multiple light passes instead of a single deep cut, and utilize jigs or templates for guidance and consistency.
What safety precautions should be taken when using a router tool?
When using a router tool, it is crucial to wear safety gear like goggles, ear protection, and a dust mask. Additionally, always secure the workpiece properly, maintain a stable stance, and avoid routing in the opposite direction of the bit rotation.
How can common router tool issues be troubleshooted?
Common router tool issues like bit slipping, burning, or vibration can be resolved by ensuring proper bit installation and tightening, adjusting the speed and depth settings, and examining the condition and sharpness of the router bit.
What are some advanced techniques and projects that can be explored with a router?
With a router, you can explore advanced techniques like dovetail joinery, edge profiling, inlay work, and creating complex decorative patterns. Additionally, you can undertake projects like building cabinets, crafting intricate wooden signs, or creating custom moldings.


Leave a Reply