A Beginner’s Guide to Sanding Techniques
Are you a DIY enthusiast looking to take your woodworking skills to the next level? One of the essential skills to master is the art of sanding. Whether you’re refinishing a piece of furniture, smoothing out rough edges, or preparing surfaces for painting, knowing the proper sanding techniques is crucial. In this beginner’s guide to sanding techniques, we will cover everything you need to know to achieve a smooth and professional finish.
From choosing the right sandpaper grit to preparing the surface for sanding, using the correct sanding tools, mastering different sanding techniques, and finishing and polishing the sanded surface, we will provide you with the knowledge and tips to tackle any sanding project with confidence. By the end of this guide, you’ll be equipped with the skills and understanding to achieve professional-looking results on all your sanding projects. So, grab your sandpaper and let’s dive into the world of sanding!
Choosing the Right Sandpaper Grit
When it comes to sanding, choosing the right sandpaper grit is crucial for achieving the desired results. The grit of sandpaper refers to the number of abrasive particles per square inch of the paper. The lower the grit number, the coarser the sandpaper will be, and the higher the grit number, the finer the sandpaper will be.
For rough sanding and removing material quickly, it’s best to use a low grit sandpaper such as 60 or 80 grit. These grits are ideal for smoothing out rough surfaces, removing varnish or paint, or shaping wood. On the other hand, for fine sanding and achieving a smooth finish, higher grit sandpapers such as 120 or 220 grit are more suitable.
It’s important to assess the condition of the surface you’ll be sanding before selecting the sandpaper grit. If the surface has deep scratches or rough spots, a lower grit sandpaper may be necessary to start with, followed by progressively higher grits to achieve a smooth finish.
Ultimately, choosing the right sandpaper grit can make a significant difference in the outcome of your sanding project, so take the time to select the appropriate grit for the task at hand.
Preparing the Surface for Sanding
Before you start the sanding process, it is crucial to properly prepare the surface to ensure the best results. This includes cleaning the surface to remove any dirt, dust, or debris that could affect the sanding process. Use a cleaning solution and a cloth to thoroughly clean the surface, making sure to remove any stubborn stains or grease.
After cleaning, it is important to inspect the surface for any imperfections or damage that may need to be addressed before sanding. Look for cracks, dents, or uneven surfaces that will require filling or repairing. These imperfections can affect the quality of the sanding, so it is important to address them beforehand.
Once the surface has been cleaned and inspected, it may be necessary to protect any areas that you don’t want to be sanded. This can be done using painter’s tape or other protective coverings to ensure that only the intended area is sanded.
Finally, it is important to consider the environment in which the sanding will take place. Ensure proper ventilation and consider using a dust mask to protect yourself from inhaling harmful particles. Taking these steps to prepare the surface for sanding will ensure a smoother and more effective sanding process.
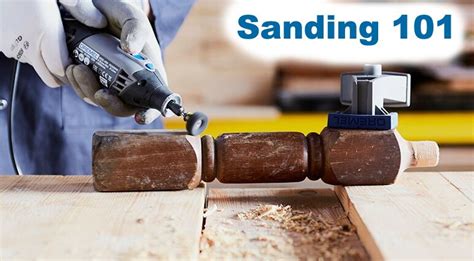
Using the Correct Sanding Tools
When it comes to sanding, having the right tools for the job is crucial. Using the correct sanding tools can make the process much easier and more efficient. One of the most important tools you’ll need is a good quality sander. Whether it’s a random orbital sander, belt sander, or detail sander, having the right type of sander for the surface you’re working on is key.
Another essential tool for sanding is a sanding block. This handheld tool helps to provide even pressure and control while sanding, ensuring a smooth and consistent result. Additionally, having a variety of sandpaper grits on hand is important for different stages of the sanding process.
For larger projects, a power sander can be a game changer. These tools are ideal for speeding up the sanding process and getting a more uniform finish. Whether it’s a palm sander, orbital sander, or belt sander, choosing the right power sander for the job is essential for achieving professional results.
Having the correct sanding tools at your disposal can make a world of difference when it comes to achieving a smooth and professional finish. Investing in high-quality tools and understanding how to use them properly will ultimately save you time and effort in the long run.
Mastering Different Sanding Techniques
When it comes to achieving a smooth and flawless finish on your woodworking projects, sanding techniques play a crucial role. There are various sanding techniques that you can master to ensure that you achieve the desired result.
One of the most important sanding techniques to master is the use of different sandpaper grits. Starting with a coarser grit to remove imperfections and then gradually moving to finer grits for a smooth finish is essential for achieving professional results.
Another important sanding technique to master is the use of proper sanding strokes. Whether it’s using long, even strokes or circular motions, understanding the right technique for each project is essential for achieving the best results.
Furthermore, mastering the use of sanding blocks and power sanders is crucial. Knowing when and how to use these tools effectively can save time and energy while achieving a consistent finish.
Finishing and Polishing the Sanded Surface
After the hard work of sanding is complete, it’s time to focus on finishing and polishing the surface. This is the stage where you can really bring out the beauty of the wood or other material you have been working on. The finishing process involves choosing the right type of finish for the material, whether it’s paint, varnish, or a natural oil. Each type of finish will have its own application process and drying time, so it’s important to follow the manufacturer’s instructions carefully.
Once the finishing process is complete and the surface is dry, you can move on to polishing. This step involves using a fine-grit sandpaper to smooth out any imperfections in the finish and create a smooth, even surface. It’s important to use the correct sanding tools to ensure that you don’t damage the finish you’ve worked so hard to achieve. A sanding block or orbital sander with a fine-grit sandpaper is ideal for this stage.
Mastering the art of finishing and polishing a sanded surface takes practice and patience. It’s important to take your time and pay attention to detail to achieve a professional-looking result. A well-finished and polished surface will not only look beautiful but will also be more resistant to wear and tear, making your hard work last for years to come.
Remember, the finishing and polishing stage is just as important as the sanding stage in achieving a professional result. By taking your time and using the correct techniques and tools, you can create a surface that is not only smooth and beautiful but also durable and long-lasting.
Frequently Asked Questions
What is the importance of choosing the right sandpaper grit?
Choosing the right sandpaper grit is crucial in achieving a smooth and even sanded surface. Coarser grits are suitable for rough sanding, while finer grits are ideal for achieving a polished finish.
How should one prepare the surface for sanding?
Preparing the surface for sanding involves cleaning the surface to remove any dirt or debris, and ensuring it is smooth and dry before beginning the sanding process.
Which sanding tools are essential for a beginner?
Essential sanding tools for beginners include sandpaper, sanding blocks, and electric sanders. These tools can be used for different sanding needs and provide better control over the sanding process.
What are some different sanding techniques to master?
Different sanding techniques to master include sanding with the grain, cross-grain sanding, and circular sanding. Each technique is suited for different types of surfaces and finishes.
What finishing and polishing techniques can be used on sanded surfaces?
After sanding, finishing and polishing techniques such as staining, varnishing, or waxing can be used to enhance the visual appeal and durability of the sanded surface.


Leave a Reply